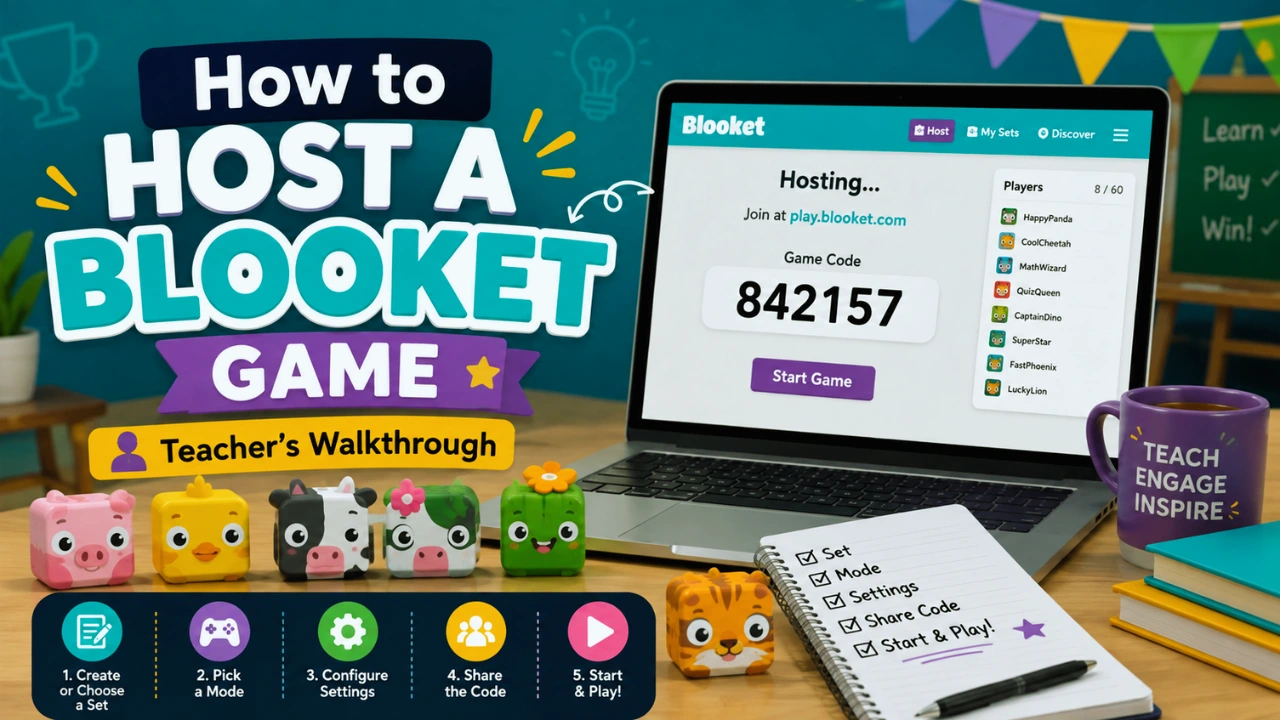
How to Host a Blooket Game: Teacher’s Step-by-Step Guide
Hosting your first Blooket session is easy once you know where everything is. The actual setup can take only a few minutes, but your first attempt is better done before students arrive rather than while an entire class waits.
The basic process is simple choose a question set, select a game mode, configure the session, share the game code with students, and start playing.
The choices you make during setup matter, though. A competitive mode can turn a quiet review lesson into a noisy race, while the right timer and nickname settings can make classroom management much easier.
This guide explains how to host a Blooket game from beginning to end, with practical tips for teachers using it for the first time.
Quick Answer
To host a Blooket game, sign in to your Blooket account, select or create a question set, click Host, choose a compatible game mode, configure the game settings, and generate a join code. Students enter that code on Blooket’s play page, choose their names, and wait in the lobby until you start the game.
What Do You Need to Host a Blooket Game?
You need three basic things:
- A Blooket teacher account
- A question set
- Student devices with an internet connection
Students generally don’t need to create their own accounts to participate in a live hosted session. Instead, they join using the game information provided by the host.
That makes Blooket useful for quick classroom activities because you don’t have to spend the first part of the lesson getting every student registered.
If you’re completely new to the platform, our Blooket guide explains the basic features before you begin hosting.
Step 1: Find or Create a Blooket Question Set
Every game needs questions.
Teachers have two practical options use an existing set or create their own.
Use an Existing Question Set
Blooket has a Discover area containing public question sets created by other users.
Search for your subject or lesson topic and review the available sets before using one with students.
Don’t assume that a set is suitable just because the title matches your lesson.
Check:
- Question accuracy
- Difficulty level
- Answer choices
- Vocabulary
- Curriculum relevance
- Number of questions
A set called “Grade 7 Fractions,” for example, may still contain material your class hasn’t covered.
Create Your Own Blooket Question Set
Creating your own set gives you greater control over what students practice.
Give the set a clear title and description, then add questions and possible answers. Mark the correct response carefully before moving to the next question.
Teacher-created sets are especially useful for:
- Vocabulary reviews
- Exam preparation
- Science terminology
- Historical dates and events
- Maths practice
- Reading comprehension
- End-of-unit revision
If you already have a large collection of questions, check Blooket’s available import options rather than entering every question manually.
How Many Questions Should You Add?
For a normal classroom review, around 20 to 30 well-written questions is often a practical starting point.
You don’t necessarily need hundreds of questions. Many Blooket modes can reuse questions during the session, so quality and relevance matter more than creating an enormous question bank.
Q: Can teachers create their own Blooket questions?
A: Yes. Teachers can build custom question sets for a particular lesson, subject, or revision activity. Creating your own set also gives you more control over difficulty and curriculum alignment than relying entirely on public sets.
Step 2: Choose the Right Blooket Game Mode
Once you’ve selected your question set, choose Host and select an available game mode.
Don’t treat this as a cosmetic decision.
The mode affects pacing, competition, student interaction, and the overall atmosphere of the lesson.
A straightforward mode can work well when you’re introducing Blooket. More strategic modes may require additional explanation before students understand what they’re supposed to do.
Our complete Blooket game modes guide explains the different options in more detail.
Which Blooket Mode Is Best for a First Game?
For your first hosted session, choose a mode with simple rules.
Your objective during the first game should be getting students comfortable with:
- Joining correctly
- Answering questions
- Understanding the interface
- Moving through the game
- Finishing the session
Once students understand the basic Blooket workflow, you can introduce modes that include additional strategies and game mechanics.
| Classroom Goal | What to Look for in a Mode |
|---|---|
| Quick review | Simple rules and fast questions |
| Test preparation | Strong focus on answering questions |
| High-energy lesson | Competitive gameplay |
| Longer activity | Progression or strategy mechanics |
| First Blooket lesson | Minimal explanation required |
Teacher tip: Don’t choose a complicated mode simply because it looks entertaining. A five-minute explanation can consume a large portion of a short lesson.
Step 3: Configure Your Blooket Host Settings
After selecting the mode, Blooket displays the available settings for that game.
These can vary depending on the mode.
Pay particular attention to the ending condition, joining options, and student names.
Set a Time Limit or Goal
Depending on the mode, the game may finish when:
- A timer expires
- A player reaches a particular target
- Another mode-specific condition is achieved
For classroom teaching, a timer is often easier to manage.
If your lesson ends at 10:45 and you need five minutes afterward to discuss the answers, you don’t want a game unexpectedly continuing until 10:44.
Decide Whether Students Can Join Late
When available, late joining can be helpful.
A student’s tablet might restart. Someone may arrive late. Another student might accidentally close the browser.
Allowing late joining can prevent these small technical problems from stopping a student from participating.
Think About Nicknames
Student-generated nicknames can become a classroom-management issue surprisingly quickly.
If your available settings provide an appropriate alternative for student names, consider using it.
Otherwise, establish the rule before displaying the join code.
Q: What settings should teachers check before hosting Blooket?
A: Check the game’s ending condition, time limit, joining options, nickname controls, and any mode-specific settings. Configure these before students join so you don’t change the rules while the class is waiting.
Step 4: Share the Blooket Game Code
When the session is ready, Blooket generates joining information for students.
Display the code where everyone can see it.
Students then open Blooket’s student joining page, enter the game code, choose their Blook avatar, and appear in your lobby.
For detailed student instructions and troubleshooting, see our step-by-step Blooket join guide.
Check the Lobby Before Starting
Don’t immediately hit Start when the first few students appear.
Use the lobby to confirm that:
- Everyone who should be there has joined
- Students haven’t joined twice
- Names are appropriate
- Nobody is still struggling with the join page
- The class understands what happens next
A 30-second lobby check can prevent several minutes of disruption later.
Step 5: Start the Blooket Game
Once everyone is ready, start the session.
What happens next depends on your chosen mode. Students may answer questions while racing, collecting resources, progressing through a challenge, or participating in another game mechanic.
Your role also changes at this point.
Instead of simply watching the leaderboard, pay attention to the classroom.
Look for students who:
- Are repeatedly getting questions wrong
- Don’t understand the game mechanics
- Have stopped participating
- Are having technical problems
- Are rushing without reading questions
The game itself is only one layer of the lesson.
Step 6: Manage Students During the Game
Classroom technology rarely runs perfectly.
A student may lose connection. Someone might use an inappropriate nickname. Another device might freeze.
When host controls allow it, use the available player-management options to keep the session running smoothly.
It’s also worth establishing expectations before starting.
For example:
“Your score is part of the game. Correct answers are the learning goal.”
That small distinction matters because some students become so focused on winning that they stop reading questions carefully.
Don’t Let the Leaderboard Become the Lesson
Competition can increase engagement, but it can also distract from learning.
If students are clicking answers as quickly as possible to move ahead, pause after the game and revisit the questions that caused difficulty.
Blooket works best when gameplay creates useful feedback rather than replacing instruction.
Step 7: Review the Results After the Game
Don’t close the tab until students celebrate the winner.
The results are one of the most useful parts of a classroom game.
Depending on your account level and the reporting available for that activity, you may be able to review overall performance and more detailed information on students or questions.
Use the report to identify:
- Concepts the class understands
- Questions many students missed
- Possible misconceptions
- Topics that need reteaching
- Material suitable for another review session
This turns Blooket from a classroom game into a formative assessment tool.
A Simple Post-Game Routine
After each session, ask yourself three questions:
Which question caused the most difficulty?
If a large portion of the class missed it, the issue may lie with the concept rather than with individual students.
Was the question itself clear?
Sometimes poor results come from confusing wording.
What should I reteach?
Choose one or two weak areas and address them before moving on.
If detailed reporting is important to you, our Blooket Plus review examines the premium features and whether they offer enough value for teachers.
How Do You Assign Blooket as Homework?
Blooket isn’t limited to live classroom sessions.
Where supported, teachers can assign compatible activities for students to complete outside the live lesson.
The basic workflow is:
- Select your question set.
- Choose the appropriate assignment or homework option.
- Select a compatible mode.
- Configure the assignment.
- Set the required deadline where applicable.
- Share the generated link or joining information.
- Review results after students complete it.
You can distribute the assignment through your school’s usual learning-management or communication platform.
Homework can be particularly useful for revision because students don’t all need to be online at the same time.
Q: Can Blooket be used for homework?
A: Yes, compatible Blooket activities can be assigned for students to complete independently rather than joining a live teacher-hosted session. Availability and assignment settings can depend on the selected mode and current Blooket features.
Common Blooket Hosting Problems and How to Fix Them
Your first game may expose a few issues that aren’t obvious during setup.
| Problem | Practical Fix |
|---|---|
| Student can’t join | Verify the game information and joining page |
| Inappropriate nickname | Deal with it before starting the game |
| Student disconnects | Use late joining or rejoining when supported |
| Game takes too long | Use a timer when predictable lesson timing matters |
| Students don’t understand the mode | Explain the objective before starting |
| Weak school Wi-Fi | Reduce unnecessary network activity and have a backup activity |
| Students focus only on winning | Review missed questions after the game |
The Most Common Mistake: Not Testing the Game
Preview your question set and understand the chosen mode before class.
A two-minute test can reveal:
- Incorrect answers
- Typos
- Confusing questions
- Unexpected mode mechanics
- Settings you forgot to change
It’s much easier to fix those at your desk than with thirty students watching.
A Practical Blooket Teacher Setup Checklist
Before class:
- Sign in to your Blooket teacher account.
- Select or create the question set.
- Check every question for accuracy.
- Choose an appropriate game mode.
- Review the mode rules.
- Configure the time or winning condition.
- Check joining and nickname settings (for student privacy controls, see is Blooket safe for kids).
- Make sure the classroom internet connection is working.
- Decide how long the game should run.
- Leave time afterward to discuss results.
During class:
- Display the joining information clearly.
- Check student names in the lobby.
- Confirm everyone has joined.
- Explain the objective before starting.
- Monitor students during gameplay.
Afterward:
- Review the results.
- Identify commonly missed concepts.
- Discuss difficult questions.
- Correct any weak questions in your set.
- Use the results to plan follow-up teaching.
Expert Tips for Hosting a Better Blooket Lesson
1. Treat the Game as Part of the Lesson
Don’t add Blooket simply because you have ten minutes left.
Decide what the game is supposed to achieve.
Is it checking prior knowledge? Reviewing vocabulary? Preparing for an exam? Finding misconceptions?
Your set of questions should match that objective.
2. Keep Questions Easy to Read
Students are answering on screens while also paying attention to game mechanics.
Avoid unnecessarily complicated sentences.
If the lesson objective is to identify the capital of France, ask for that directly. Don’t turn a simple knowledge check into a paragraph of reading unless reading comprehension is the skill you’re testing.
3. Mix Difficulty Levels
A good set shouldn’t contain 25 questions that are all equally easy.
Try a progression:
- Several confidence-building questions
- Core curriculum questions
- A few questions requiring deeper thinking
- One or two challenging questions
This keeps stronger students engaged without making the activity inaccessible to everyone else.
4. Use Wrong Answers Deliberately
Incorrect options shouldn’t always be random.
Use common misconceptions as distractors.
For example, if students frequently confuse two scientific terms, include the commonly confused term as an incorrect option. Their responses can then reveal whether the misconception still exists.
5. Always Discuss the Results
This is the step that turns gameplay into teaching.
Even a two-minute discussion can be valuable:
“Most of us got Question 14 wrong. Why?”
Now the game has identified a learning gap and created an opportunity to fix it.
Final Thoughts
Learning how to host a Blooket game isn’t difficult. The technical process is simply selecting questions, choosing a mode, configuring the session, sharing the joining information, and starting the game.
Hosting it effectively takes a little more thought.
Choose a mode that fits the lesson. Set a predictable time limit when necessary. Check student names before starting. Most importantly, review the results afterward.
A successful Blooket session shouldn’t end with the leaderboard. It should tell you something useful about what your students understand and what you need to teach next.
FAQ
Do I need a paid account to host a Blooket game?
No. Teachers can use Blooket’s free account to create or select question sets, and host supported classroom games. Paid plans primarily add or expand certain features rather than being a basic requirement for hosting. Always check Blooket’s current plan details if a particular feature or player capacity is important to you.
How do students join a Blooket game?
Students use the joining information generated by the teacher’s hosted session. They open Blooket’s student play page, enter the game code or follow the provided link, complete the nickname or identity prompts, and enter the lobby. They normally wait there until the teacher starts the live game.
How many students can join a Blooket game?
The maximum number of players can depend on the teacher’s account plan, game mode, and Blooket’s current limits. If you’re planning a large session rather than a normal classroom activity, check the current player limits before the lesson instead of assuming every mode supports the same number.
Can I create my own Blooket question set?
Yes. Teachers can create custom question sets instead of relying entirely on public sets. This is often the better option for curriculum-specific teaching because you control the wording, difficulty, correct answers, and topics being tested. Existing questions may also be reusable through Blooket’s supported creation and import tools.
What is the best Blooket game mode for teachers?
There isn’t one best mode for every lesson. A simple mode is usually preferable for students using Blooket for the first time, while more strategic or competitive modes can work well once students understand the platform. Choose based on your learning objective, available lesson time, and desired level of competition.
Can Blooket be assigned as homework?
Yes, when the selected activity supports an assignment or homework format. Instead of everyone participating simultaneously, students can complete the activity independently using the information or link provided by the teacher. This makes Blooket useful for revision, practice, and activities that don’t require the entire class to be online at the same time.
Can teachers remove students from a Blooket game?
Blooket provides host and player management controls for live sessions, although specific options can vary by mode and the current platform interface. Teachers should monitor the lobby before starting and use available controls if a student joins incorrectly or classroom-management issues arise.
Should I use Blooket for assessment?
Blooket works particularly well for low-stakes formative assessment, review, and the identification of learning gaps. It shouldn’t automatically replace a formal assessment simply because scores are available. Use the results alongside classroom observations and other assessment methods, especially when important academic decisions depend on the outcome.

Table of Contents