Preparing Your Images
To upload full-size pictures on Instagram, you must first prepare your images. This means selecting the photos you want to upload, adjusting their size and resolution, and ensuring that they meet the quality standards of Instagram.
In this section, we’ll look at the best practices for preparing your images for a successful Instagram upload.
Resize your images to the optimal size
Whether you’re taking pictures from your phone, tablet, or computer, you will want to ensure that the image you upload is the correct size for Instagram. The optimal Instagram image size for posts is 1080px by 1080px for an aspect ratio 1:1 (square).
For landscape images, ensure that your aspect ratio is between 1.91:1 and 4:5 with a resolution of at least 1080px tall. For portrait images, your aspect ratio should be between 4:5 and 1:1 (square), with a resolution of at least 1080px wide.
The maximum file size on Instagram is 30MB, which means that whatever picture you upload should be as close to these measurements as possible, as any additional space in the image will increase the file size and make it harder to load.
Many free online tools, such as TinyPNG or Canva, are available for resizing images. These tools can help you adjust your images to fit into either landscape or portrait mode without distorting the original size or resolution.
Additionally, cropping out extras can help reduce your file size and make it easier to upload onto Instagram!
Compress your images to reduce the file size
When uploading photos to Instagram, it’s important to remember that the platform has a file size limit of 8 MB. You may need to compress your images before they can be uploaded to the site.

Compressing images is fairly simple and can help ensure that your full-size photos are quickly uploaded without issue.
One of the most effective methods to compress an image is a lossy compression method, which reduces the file size by discarding bits of information from your photo.
The most popular lossy compression method is JPEG, which drastically minimizes file size without compromising too much quality.
Best practices for compressing JPEGs suggest reducing the resolution to no less than 2,000 pixels wide and setting the compression rate low enough to keep image details sharp and clear.
If you don’t have access to professional software such as Photoshop or Lightroom, there are plenty of free web tools available for quick image compression, like compressor.io or TinyPNG, which allow you to upload your pictures before immediately downloading them at a reduced size.
It’s also worth noting that other photo formats, such as PNG and GIF, are much larger than JPEGs due to their lack of compressibility; these formats may need to be converted into another format before they can be uploaded onto Instagram at optimal speeds.
Uploading Your Images
Instagram is an incredibly popular social media platform. You must optimize your uploads to stand out and get the most out of the platform.
For images, you should be uploading full-size photos instead of compressed versions. This section will cover how you can upload full-size pictures on Instagram.
Log in to your Instagram account
Logging in to your Instagram account is the first step in uploading a full-sized image. To log in, enter your username and password in the necessary fields and click ‘Login.’
If you have difficulty logging in, double-check that the information you entered is correct, or try resetting your password. Once you’ve successfully logged in, you can upload your picture.

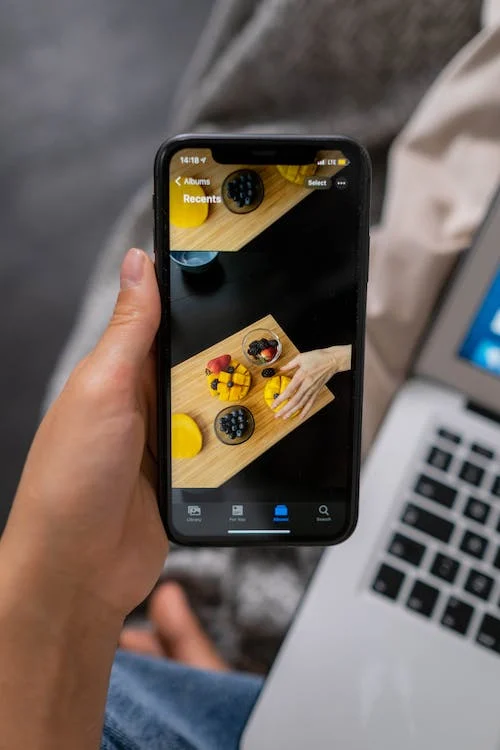
Choose the image you want to upload
The first step when uploading your images to Instagram is to choose the image you want to upload. You can pick an image from your device’s photo library or take a new photo directly within Instagram.
A photo from your device’s library can be located in your Photos app or stored in another app, such as Dropbox. Once you find the photo you want, tap it once to select it.
If you took the picture using another app, such as Snapchat or Pokemon Go, finding the photo may require transferring files first since those apps don’t share files easily with other apps.
To transfer images from one app to another on iOS devices, use AirDrop; Android users should select ‘Share’ and send directly to the Instagram application.
Once you have chosen or taken a picture ready for upload and selected it on Instagram, editing options will appear at the bottom of your screen.
Some standard filters and editing controls for brightness and contrast are available, which you may want to adjust before posting.
After choosing an edit filter and tweaking any settings if desired, press next at the top right corner of your screen and continue to the captioning step in uploading your images on Instagram.
Edit the image if needed
Before you upload images to Instagram, you must ensure that your images are the right size and look their best. Depending on where you have saved the image, you may need to adjust a few settings to ensure it can be uploaded properly.
If the image is in an editing program such as Adobe Photoshop, GIMP, Paint.net, or any other editing software, it’s worth taking time to edit the picture as needed.
This could involve changing the photo’s overall color, brightening it up, reducing highlights and shadows, or adding a text or graphic overlay.

You want your image to look great on Instagram, so it’s worth time to perfect your work before uploading it.
You can also use Instagram’s built-in filters and creative tools within their app, allowing you to apply effects like sepia toning, vignettes, frames, etc.
Enhance sharpness, reduce graininess, or adjust colors if needed. Having said all that, if your photo already looks amazing in its original form, you can upload it away!
Posting Your Image
Posting full-size pictures on Instagram is easy, no matter whether you’re uploading from a desktop or mobile device.
With the right step-by-step guide, you can post your photos in full resolution, enjoy high-quality visuals, and show off your artwork and more on Instagram. Let’s look at how to upload your full-size pictures on Instagram.
Write a caption
Writing an eye-catching caption for your image is a great way to engage viewers and drive engagement on your posts.
Your caption should be no more than two sentences, highlighting the key aspects of the photo in a concise manner that is engaging and encourages conversation.
Additionally, you can use hashtags to extend your reach and increase visibility for the image or post. Before posting your image, make sure you take some time to carefully craft the perfect caption that will draw people in and get them excited to view it.
Add hashtags
Adding hashtags to images can help your posts reach a wider audience and increase engagement. When you add a hashtag, you’re including a keyword that makes it easier for people to find your post.
This can help if your content is niche or you want to target influencers in your industry who might be interested in sharing it with their followers.
To add a hashtag, type the pound or hashtag symbol (#) followed by the name of the topic or phrase you want to include. Ensure that each word has no gaps and that all the letters are lowercase (no capitals).
For example, if you wanted to tag a post about coffee, you would write #coffee. Don’t add too many — aim for between three and seven hashtags per post so it looks natural and isn’t overwhelming.
While technology has opened up new ways of connecting with different audiences, remember that quality content is still more important than quantity; focus on creating engaging posts that offer real value instead of only stuffing everyone with hashtags.
Choose the audience you want to share your image with
When posting your image to Instagram, it is important to consider who you want to share it with. Before uploading your image, go to the “Edit Settings” page and choose the audience you want to share with.
You can choose between the Public, Friends, or Only me. Choosing Public will ensure the maximum number of people see your photo, while Friends allow colleagues, family, and friends to view the photo. Finally, selecting “Only Me” ensures only you can view your post.
The audience settings do not just apply to posts – they also apply whenever something is tagged with you.
If you’re tagged in a post by someone else and want an even more restrictive audience setting than what was originally set for that image, visit that item edit settings and use the audience selector pull-down menu located at the bottom of the screen (accessible from both mobile devices and computers).
Knowing how to manage who can see what images can help ensure privacy when posting online images on Instagram. It is important to maintain a professional online presence if necessary for personal safety reasons.
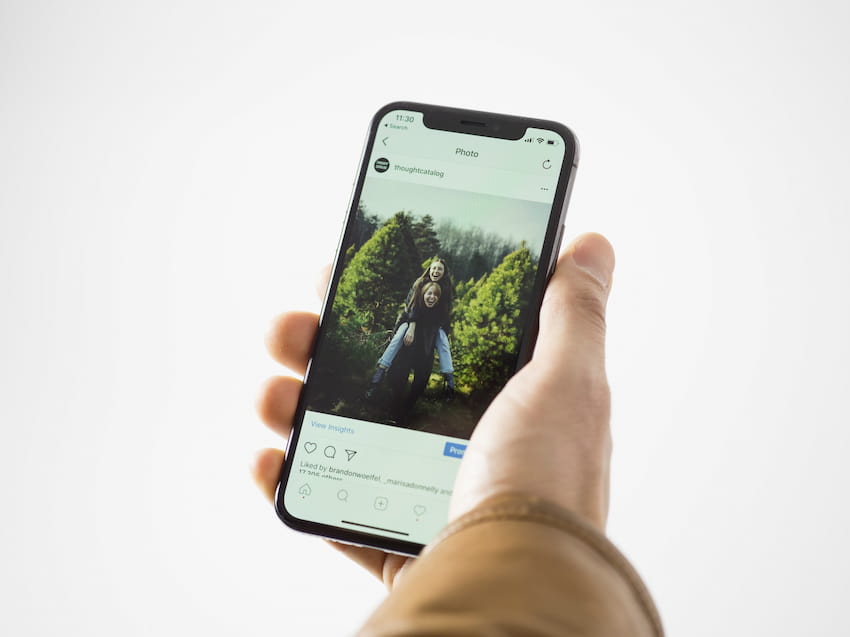
Post your image
Posting a full-size picture on Instagram doesn’t have to be complicated. With this simple guide, you’ll know how to do it quickly and easily.
First, insert the image into a post by clicking “Image” or the “+ Photo or Video” button at the bottom of the page.
You will be prompted with a box where you can choose whether to take a photo or video with your device’s camera or upload it from your phone’s library. Select either option and proceed as normal.
Once you’ve chosen your image, Instagram will prompt you to crop it for display. Don’t crop it and instead press “cancel”. This will keep the image at its original resolution, which is preferable for higher-quality images.
Finally, you can press “Share” and post the full-size image! The maximum resolution of Instagram pictures is 2048 x 2048 pixels, so anything larger than this may not be uploaded properly. Once posted, everyone who views your picture will enjoy its full-size version so they can take in all its details!
Table of Contents