Understand Instagram’s Image Requirements
While some images look great when cropped, most places that require image postings need the image to remain in its original dimensions.
Instagram has strict guidelines about image dimensions. Understanding the requirements is the first step to getting your images to fit properly on the platform. Let’s explore these guidelines in detail.
Know the minimum and maximum image dimensions
Before you post a picture on Instagram, it’s important to know that it must fit certain criteria. Photos must be a minimum of 320 x 320 pixels and a maximum of 4096 x 4096 pixels.
Instagram also supports an aspect ratio of 1:1 to 4:5, which means images can be 1×1 pixels up to 4×5 pixels. It’s important to keep the resolution within these margins so that your pictures look as clear and sharp as possible.
To ensure accuracy, you should use an image editing program such as GIMP or Photoshop to ensure your image is the correct size and resolution before posting. You can also adjust the aspect ratio of the image if needed by cropping the picture or stretching it out accordingly. For a simpler and more user-friendly approach, consider utilizing the best free photo resizing software available, which can efficiently resize and adjust the aspect ratio of your images without the complexity of advanced editing programs like GIMP or Photoshop.
If you’re new to photo editing software, plenty of free online tutorials are available for help! Once you have your image correctly formatted and sized, save it and upload it confidently, knowing that all its details will stay intact when posted on Instagram.
Understand the aspect ratio requirements
For your images to appear correctly on the Instagram feed, it is important to understand the platform’s aspect ratio requirements. Generally, the recommended aspect ratio for landscape and portrait photos is 4:5.

This means your image’s width should always be twice its height to fit correctly without cropping. When creating an image, it may be beneficial to note the target dimensions as this will guarantee a perfect fit and help ensure that your photos stand out in someone’s feed.
To illustrate how different sizes fit on Instagram, here are a few different examples. For landscape images, 4:5 is the ideal aspect ratio, but will display perfectly when sized at 1:1 (square) or 16:9 (widescreen).
Portrait photos should always be uploaded at 4:5 but can also appear in 1:1 or 9:16 ratios. By understanding these dimension requirements and utilizing them effectively, you will create optimized Instagram posts and maximize engagement on your account!
Resize Your Image
If you’re trying to post a picture on Instagram, and it’s a bit too large and won’t fit, you can easily resize it to fit perfectly.
By resizing your image, you can keep your content looking great without having to crop it. There are a few ways to resize your image, so let’s break down your options.
Use photo editing software to resize your image
Resizing an image to fit on Instagram without cropping it can be accomplished in various ways. One of the most common methods is to use a professional photo editing software program.

These programs allow you to easily adjust your image’s size, orientation, and aspect ratio. It also usually features more advanced features such as layers, layers styles, and filters for more complex edits.
Photo editing software will require you to open an existing image file from your computer or import it from an external source such as Dropbox or Google Drive.
Once you have the image open in your editor, look for controls that allow you to manually adjust the size and rotate the image to fit on Instagram without cropping it.
Some popular free photo editing programs include Gimp, Paint.NET, and Photopea Editor. Be sure that once you’ve completed any edits, save your work to ensure that it looks exactly how you intended it when posted on Instagram!
Use a web-based image-resizing tool
One of the quickest ways to resize your image and make it fit on Instagram without cropping is to use an online image resizing tool. Most of these tools are free and easy to use.
First, find a web-based image resizing tool such as Pixlr, Canva, or PicMonkey. These tools allow you to quickly resize your images by inputting the exact size (in pixels) you want your photo to be.
Many of these tools offer additional features, including cropping your photo or adding text. Many websites offer custom frames that allow you to resize a picture without changing its aspect ratio, ensuring it does not look stretched or distorted when uploaded onto Instagram.
After completing your edits, download the new image to your device and upload it onto Instagram directly from the website.
Add Text and Graphics
Adding text and graphics to your images can make them fit on Instagram without cropping. Text can be used to summarize a post or create an attention-grabbing caption.
To maximize their impact, you can also add logos, captions, and other graphics to your photos. Let’s explore how to add text and graphics to an image to make it Instagram-ready.
Use photo editing software to add text and graphics to your image
To make your Instagram post stand out, you can use photo editing software like Adobe Photoshop or Canva to add text, graphics, and effects to your image.
This will help your picture fit better on the platform without being cropped. A professional image editing program allows for more options than mobile apps.
If you understand what type of elements work best when designing for Instagram, creating graphics and adding text could be the perfect solution for making pictures fit on Instagram without cropping them.
When using design software like Photoshop or Canva, consider the following tips:
- Create an overlay that matches your image size and cropping to ensure it will conform when you post it.
- Adjust the color balance and brightness so that the added text or graphic elements don’t overpower your original photo.
- Choose simple and modern fonts to complement your image’s overall look.
- Experiment with different layout options if you’re working with multiple images – use grids or even split one large image into several smaller ones for a creative collage display.
- Include shadows or outlines around graphics or text boxes to give them more depth and interest.
- Use a web-based tool to add text and graphics to your image
Using a web-based tool to add text and graphics to your image is one of the best ways to make an image fit on Instagram without cropping.
Most mobile phones do not have the capability to add advanced changes to images like fonts, text layers, and graphics, so using an online tool can be beneficial. Many of these tools are free and easy to use.
By adding text or graphics such as logos, symbols, or shapes onto your photo, you can effectively reduce the size of the image itself, making it easier for the image not to take up so much space on Instagram’s square format grid.
You can use various tools, including Canva, Fotor, Adobe Spark Post, and other online options.
If you’re considering putting text onto your photos, you’ll have a huge selection of custom fonts to choose from — allowing you to create amazing typography or incorporate texts into branded design elements with ease.
As well as this, many online tools also allow you to apply predefined elements designed specifically for social media posts, like frames or banners available in different sizes that adhere better to Instagram’s format requirements.
Using an online tool gives you full control over your photos and images before posting them on Instagram.
This could be instrumental in boosting engagement and improving how users interact with your content — ultimately helping create more effective visuals for marketing campaigns or product reviews across various channels!

Upload Your Image
Uploading your image to Instagram without cropping is the first step to ensuring the image you post looks great. To do this, you must ensure the image you upload is the correct size.
The maximum image size for an Instagram post is 1080 pixels wide by 1350 pixels tall. That’s the size that you need to make your photo fit correctly. This article will provide more details on ensuring your images are the right size to fit on Instagram without cropping.
Upload your image to Instagram
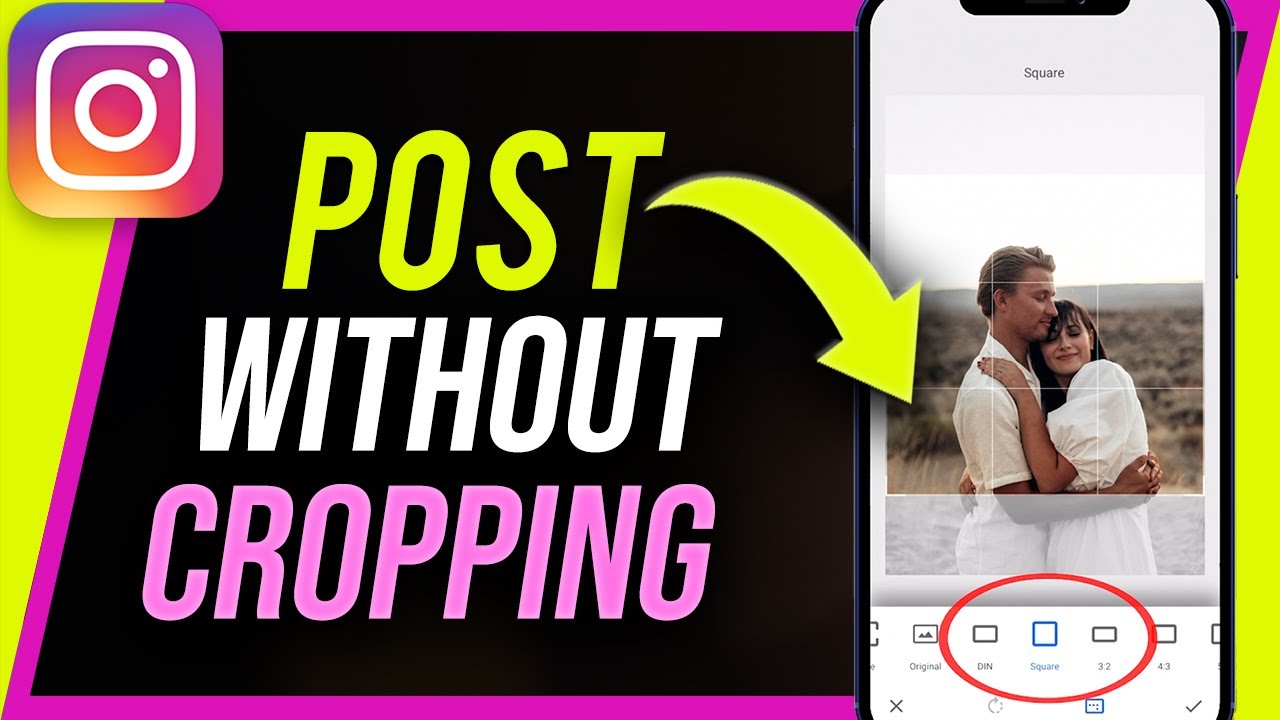
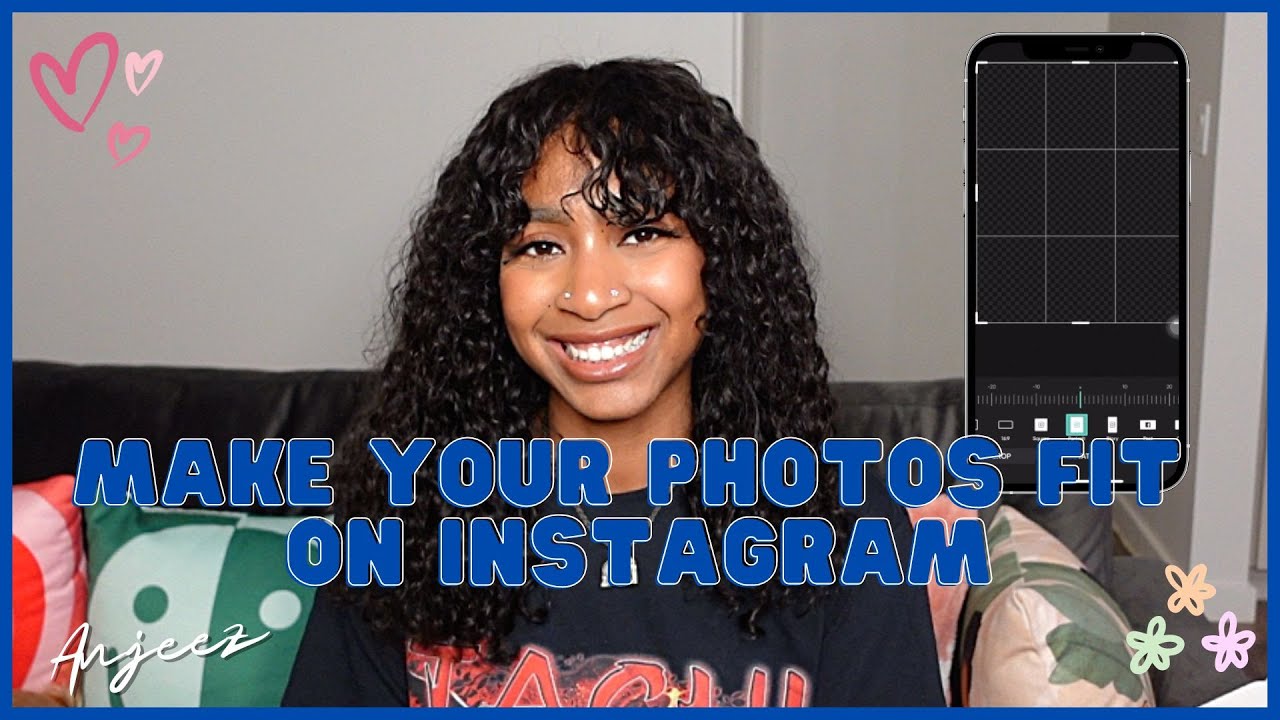
Once you’re ready to upload a photo to Instagram, several steps must be taken to present it in the correct orientation and size. First, open Instagram’s mobile app and select your photo from the device’s library.
Once the image is selected, ensure it is rotated correctly and delete any extra visuals such as watermarks or logos. After that, you can move on to the cropping stage.
Rather than cropping your image right away, tap a button resembling a square with arrows on each corner at the bottom of the screen. This will allow you to select an image that can fit properly into Insta’s 1:1 aspect ratio without losing its original shape or quality.
The picture should fit inside a rectangular box with grey arrows sticking out from each side – indicating what area will be seen in your post when uploaded.
Once you have made any desired changes, press ‘done’ and ‘next’ for Instagram to process your photo before posting!
Add a caption and hashtags
Writing a caption to accompany your image is an important Instagram process. It’s an opportunity to provide your followers with additional information about the image and compliment it.
The caption can be up to 2,200 characters long; use the space wisely, and don’t forget to make it interesting and engaging. Furthermore, including relevant hashtags (#) in your captions helps people discover what they want on Instagram and increases engagement with existing followers.
You can include up to 30 hashtags per post, but try not to overdo it – tag what is relevant or use 5-10, which are most popular for this particular photo.
Share Your Image
Sharing your image on Instagram is one of the best ways to showcase your work or insights. You want your images to fit nicely on the Instagram feed without cropping, but how do you do it? We’ll discuss how to make pictures fit on Instagram without cropping and the best methods to make your images look great.
Share your image on other social media platforms
Social media platforms are a great way to share your images with friends, family, and the world!
![]()
Whether you’re sharing photos of your latest adventure, artwork, or snapshots of your furry friends – a simple post on social media can be seen by thousands. You can use several platforms to share and promote your image instantly.
Facebook– This is one of the most popular choices for sharing images across the web. Images uploaded to Facebook are instantly visible to existing followers on the platform and can be shared easily with others via messaging or tagging in comments.
All images must adhere to Facebook’s terms of service, so it is important to familiarize yourself before uploading anything inappropriate.
Instagram – Instagram offers an ideal platform for photography lovers, focusing exclusively on visual content. From popping filters to easy hashtag usage – Instagram makes it easy for users to capture attention with their images.
It also integrates with other apps, such as Spotify and Boomerang, allowing users even more varied ways to produce content!
Twitter – Twitter provides another great option for those creating content that can easily be condensed into 280 characters or less.
Twitter also utilizes ‘trends’, making it easier for users to jump onto discussion hashtags, which could increase engagement with their photo posts.
Tumblr – An online blogging forum that allows people interested in photography and art culture to display their work on a public blog format and follow other like-minded individuals’ accounts with preferences in similar creative areas.
Each platform has unique advantages; however, getting comfortable using each individually could also find that perfect network for displaying your creativity!
![]()
Promote your image with ads
Once you’ve created your image and you want to post it on Instagram without cropping, it might be a good idea to look into promoting your post with ads. This will allow you more flexibility to stretch the creative boundaries with your photos and memes.
Ads are easy to work with since you must set up an account and select the images and social networks you want your ad to be seen on. Best of all, there is no cost involved!
You can also use ads to target specific audiences to get them excited about your sharing and promote engagement. Ads are a great way to connect with potential customers or boost visibility for certain products or campaigns.
Ads also offer insights into post performance so that you can track how people interact with your post regarding likes, shares, comments, and more.
This will help inform future content creation decisions as well as gain a better understanding of who is most likely engaging with the product or service being advertised.
Lastly, using ads makes it easier to create branded posts that look professional while still showcasing visuals without cropping or having them cut off during uploads.
This is especially beneficial for businesses and influencers who don’t have access to professional design software programs but still want polished results for their Instagram accounts.
Table of Contents