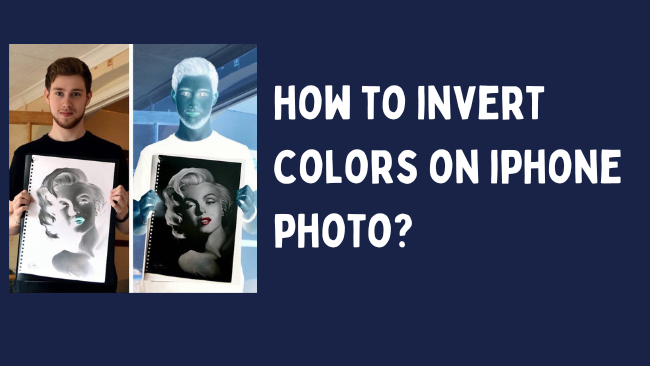
How to invert colors on iPhone photos?:
If you’re looking to change the colors on your iPhone photos, you can use a variety of apps that will help you do so. The simplest way is to take a photo and open it in an editing app like VSCO or Snapseed. From there, select the “Transform” option from the top menu, then choose “Invert Colors.”
The inverted color is a question that has been asked many times. There are 2 ways to invert colors on an iPhone photo. The first way is using the color picker, and the second way is using the editing tools.
This Video Should Help:
Tired of your iPhone’s default colors ruining your photos? Here’s how to invert them on an iPhone for a more creative look!
Inverting colors on iPhone photos
Have you ever wanted to invert the colors on an iPhone photo? Whether you’re trying to create a spooky effect for Halloween or simply want to see what your favorite picture would look like with a different color scheme, it’s easy. Here’s how:
1. Open the Photos app and select the image you want to edit.
2. Tap Edit in the top right corner of the screen.
3. Tap the button that looks like three circles in the bottom right corner of the editing pane. This will open up the various filters you can apply to your photo.
4. Scroll down and tap Color Invert. This will reverse all of the colors in your photo.
5. If you want to undo this change, just tap Revert in the top left corner of the screen
How to invert colors
To invert colors, you’ll need to access the color palette in your editing software. In most programs, this can be found in the “Image” or “Edit” menu. Once you’ve located the color palette, click on the color you want to invert. This will usually open a new window with a slider that allows you to adjust the intensity of the color. To inverse the colors, simply drag the slider to the opposite end of the spectrum.
Inverting colors on photos
Have you ever wanted to add a little flair to your photos? Well, one way to do that is by inverting the colors. This technique can give your photos a whole new and is straightforward!
First, open up the photo that you want to edit in an editing program like Photoshop. Then, go to the ‘Image’ menu and choose ‘Invert.’ That’s all there is to it! The colors in your photo will now be reversed.
You can experiment with different color schemes using the ‘Hue/Saturation tool’ to take things a step further. For example, you could try changing the hue of your inverted photo for a more drastic effect.
So there you have it – inverting colors is a quick and easy way to give your photos a unique twist. Give it a try next time you want something new to do with your images!
How to invert colors on iPhone
If you’re looking for a way to make your iPhone stand out from the crowd, one way to do so is to invert the colors on your device. This can be done easily by following these steps:
1. Go to Settings > General > Accessibility.
2. Scroll down and select “Accessibility Shortcut.”
3. Choose “Invert Colors” from the list of options.
4. Now, whenever you triple-click the Home button, the colors on your screen will invert. To return to the usual color scheme, triple-click the Home button again.
Inverting colors on iPhone pictures
If you want to add a little pizzazz to your photos, you may want to consider inverting the colors. This can be a fun way to change up the look of your images, and it’s surprisingly easy to do on an iPhone.
To invert the colors on an iPhone photo:
1. Open the Photos app and select the image you wish to edit.
2. Tap the Edit button in the top right corner of the screen.
3. Tap on the Filters button (it looks like three circles) at the screen’s bottom.
4. Scroll through the available filters until you find one called “Invert.” Tap on this filter to apply it to your photo.
5. If you’re happy with how your inverted photo looks, tap on Done in the top right corner of the screen. If you want to revert to the original image, simply tap on Cancel instead
How to invert colors on pictures
Inverting colors on pictures can be a fun way to change up the look of your photos, and it’s relatively easy to do. There are a few different ways that you can invert colors on pictures, depending on what software you’re using.
If you’re using Photoshop, there are two main ways to invert colors. The first way is to go into the Image menu at the top of the screen and select Adjustments, then Invert. This will immediately invert all of the colors in your image.
The second way to invert colors in Photoshop is to use a layer mask. First, create a new layer by clicking on the Create a new layer icon at the bottom of the Layers panel. Then, click on the Edit menu at the top of the screen and select Fill Layer A dialogue box will appear; select Black from the drop-down menu and click OK.
Now go back into the Layers panel and change the blending mode of this layer from Normal to Color Dodge. This will cause all of the black areas of your image to become transparent, revealing the inverted colors underneath.
If you don’t have access to Photoshop, there are still some ways that you can invert colors on pictures. Many photo-editing programs (such as GIMP) have an “invert” function built into them which will achieve the same effect as using Photoshop’s “Invert” command described above.
In addition, there are online tools (such as PicMonkey) that also allow you to invert colors without having any special software installed onto your computer
Inverting colors on images
Have you ever wanted to invert the colors on an image? It’s easy to do, and there are a few different ways to go about it. This blog post will show you how to invert colors on images using Photoshop, GIMP, and even Microsoft Paint!
Photoshop:
In Photoshop, there are two main ways to invert colors. The first is to use the “Invert” tool, which can be found under the “Image” menu. Simply select the layer or selection that you want to invert and click “Invert.” This will instantly invert all of the colors in your image.
The second way to invert colors in Photoshop is by using a Levels Adjustment Layer. To do this, create a new Levels Adjustment Layer by going to Layer > New Adjustment Layer > Levels. Then, simply drag the middle slider to the left or right. This will effectively inverse all of your image’s light and dark areas.
GIMP:
GIMP also has a dedicated “Invert” tool which can be found under the “Colors” menu. Simply select the layer or selection that you want to invert and click “Invert.” As with Photoshop, this will instantly reverse all of the colors in your image.
You can also use a Curves Adjustment Layer to achieve a similar effect as Photoshop’s Levels adjustment layer. To do this, create a new Curves Adjustment Layer by going to Colors > Curves from the top menu bar. Then click on either end of the curve and drag it towards the center until you’ve achieved your desired result.
Microsoft Paint:
Surprisingly, Microsoft Paint has a built-in function for inverting colors! Open your image file and go to Image > Invert Colors from the top menu bar. And that’s it! Your image will now have its colors reversed
How to invert colors on iPhone images
Inverting colors on images is a great way to add a creative touch to your photos. And it’s easy to do on your iPhone! Here’s how:
1. Open the Photos app and select the image you want to edit.
2. Tap the Edit button in the top right corner of the screen.
3. Tap the Filters button (it looks like three circles connected by lines).
4. Scroll down and tap Color Invert.
5. Tap Done when you’re finished editing your image.
Frequently Asked Questions
How do you invert colors on Apple photos?
How do I invert the colors of a picture on my phone?
How do I do color invert on iPhone?
Can you invert a photo on your iPhone?
How do I make a Negative of a picture?
How do you get inverted colors?
Table of Contents