
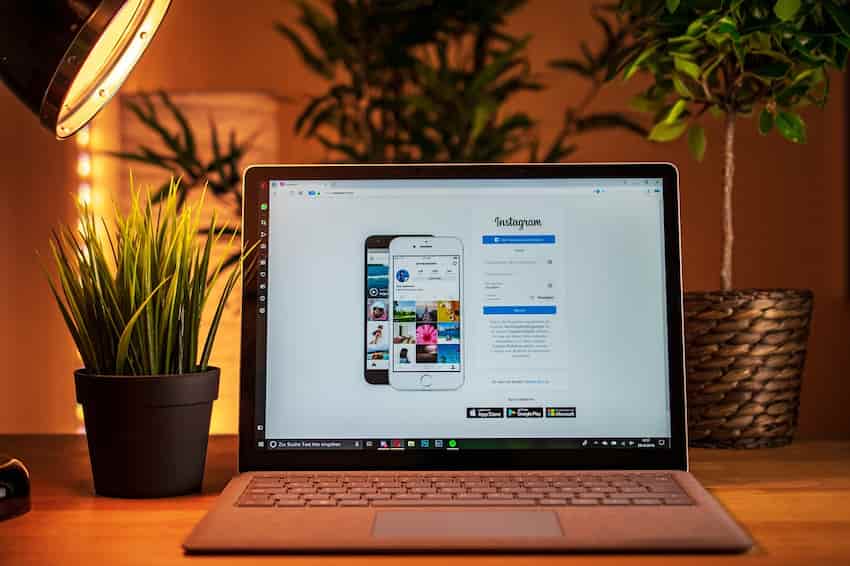
Set up Instagram on your PC
With Instagram being such a popular and widely used social media platform, it’s no surprise that many people are looking for ways to access it on their PC.
If you’re looking for an easy way to do this, you’re in the right place. In this article, we’ll discuss the 8 easy steps you must follow to set up Instagram on your PC and start swiping away. Let’s get started.
Download and install the Instagram app on your PC
Instagram for Windows 10 is now available for download in the Microsoft Store. The app is available on Windows 10 PCs and tablets from your desktop or laptop. You’ll need to have the latest version of Windows 10 before you can install it.
Once downloaded, you can open the app from the Start Menu and start posting. You’ll be required to log in using your Instagram login details and can then post, comment, send messages, or otherwise engage with other Instagram users as with the mobile versions of the app.
If you decide to uninstall the app at any time, you can do so by going to Settings > Apps & Features and locating “Instagram X Mac” (where X is the version number).
Click ‘Uninstall’ to confirm that you wish to uninstall this app. Remember that all of your content related to this app will also be deleted at this point.
Sign in with your Instagram account
To start using Instagram from your PC’s web browser, ensure you are signed in with your Instagram account.

Half-SwipeFirst, visit the Instagram website – www.instagram.com – in the web browser of your choice. Then, enter your username and password information when creating your Instagram account and select login.
Once successfully logged in, you will be directed to the home page of your profile. You can explore the content posted by accounts followed by yours, browse stories and videos shared publicly by other users, and even navigate through sections like search, profile view (where all activity related to your profile is accessed), direct messages, create posts/stories/IGTVs and more!
The Instagram app should now be successfully set up on both desktop and mobile devices – so go ahead and explore what it has to offer!
Navigate the Instagram Interface
If you’re trying to get the hang of swiping on an Instagram PC, it’s important to understand the interface. Knowing how to navigate the Instagram homepage gives you an advantage in finding the content you want to view or post quickly.
Let’s look at the features of the Instagram homepage and how you can use them to navigate to your desired content quickly.
Understand the layout and features of the Instagram app
The Instagram app is built around three major sections – Explore, Activity, and Profile.
Explore provides a tailored selection of photos, videos, and stories based on the people and topics you follow. At the same time, the Activity section will show notifications when you receive likes or comments from other users. Lastly, your Profile displays all the posts, stories, and activities you have shared.
When using the app for computer users, it’s important to understand how to navigate with your mouse cursor. On most computers, this is done by hovering your cursor over an icon or image for information about it.
Additionally, several features allow half-Swipe users to control the layout and presentation of content within the three sections of Instagram:
- Feed: This is where all of your posts will appear in chronological order
- Stories: These are short video clips that can be viewed by people who follow you and disappear after 24 hours
- Filters: Allow users to apply effects such as highlights or shadows while editing their photos before posting them
- Reels: Short videos that can be recorded directly inside the app, which are like Stories but last longer than 24 hours
- Direct Messages: A feature that allows users to receive messages from people they follow privately without it appearing publicly
- Half-Swipe Ads Manager (only available on some browsers): This allows account owners access to insights on how user engagement with their ads has been performing over time.
Learn how to use the search bar
The Search bar is a great way to explore Instagram, discover new accounts and content, and keep up with conversations and trends.

Located at the top of the Home page, it gives you access to a variety of content depending on the type of search you want to do. Here’s how to use it:
- To start searching, type your term into the Search bar (also referred to as “Search Bar”).
- You can select from Top for trending topics or People for accounts related to your term.
- For more specific search results, select tags or places; type your search terms into their respective fields at the top right of the page.
- You can also refine your results by filtering them based on post types or specific account types, such as businesses or creators that produce videos using certain cameras or programs (if available).
- After getting results from either the Top Results or People Results pages, you can select any post from within those pages, too!
- When scrolling through a list of posts, swipe left and right on a post you want to view further by opening its link. Note – This feature works best when using a mouse or trackpad instead of a touchscreen device
- When viewing an individual post directly from either search result page, then scroll down past the comments section so that you can find additional links further down relating to that same post
- To easily access relevant content while browsing on Instagram PC, open up one of those related links in a separate tab, then come back to what you have been originally looking at without having to move away from the page
Find People to Follow
Finding people to follow on Instagram on your PC can be a bit challenging, as the main way to find users is by swiping through posts.
Thankfully, there are a few simple steps to follow that make this process much easier and faster. From searching through hashtags to exploring the Explore page, let’s look at how to swipe on Instagram PC.
Use the search bar to find people you want to follow
Finding people to follow on Instagram PC is easy. You can find people who share interests or have signature looks you’d like to see more of in your feed using the search bar near the top of your screen.
You can type keywords like skateboarder, red lips, or athletic wear. Once the results populate, click the magnifying glass icon beside each profile to learn more about that person before deciding to follow them.
To dig deeper and find more appealing photos and accounts quickly, hack Instagram lets you combine words, symbol numbers, and hashtags in one search tab.
Words like #streetstyle combined with a handbag emoji might show images that match buyers based on their shopper profile. In contrast, a search for #foodphotography + the taco emoji reveals page upon page of mouth-watering mini works of art worth following!
The possibilities are endless – engage with users who use multiple hashtags on their posts, as they often have higher engagement rates due to their dedicated audience, which broadens yours!
Look through the suggested accounts
The best way to find people to follow is to look through the suggested accounts Instagram shows you. There are two main ways you can do this.
First, go to the explore tab on Instagram and scroll through the suggested content until you find people who interest you. You can even filter these search results by interests and topics.
Second, you can check out “popular accounts” by clicking the “people” tab near the top of your profile page or by clicking one of the popular posts in your home feed.
These posts often show trending users and hashtags with thousands of followers on various topics, such as business, lifestyle, fashion, food, or sports. You may be able to find someone who is both popular and specializes in a similar interest as yours quite easily with this method.
Swipe on Instagram PC
Have you been wondering how to swipe on Instagram PC? Even though swiping is a great way to browse content quickly, it is difficult to do on a desktop computer.
Fortunately, there is a workaround for this, which is easier than you might think. In this article, we’ll walk you through 8 simple steps to help you start swiping on Instagram PC.
Use the left and right arrows to swipe through posts
Navigating through posts on Instagram with your laptop or desktop computer involves using the left and right arrows at the bottom of the post. Tap either arrow to move forward or backward. This will enable you to scroll through posts, but there is another method that you can use to swipe back and forth on Instagram PC quickly.
To do this, move your cursor to the center of the post and use your mouse to move left or right. This will cause a series of related posts to appear, allowing you to quickly swipe through them without clicking each arrow.
Additionally, this shortcut will enable you to browse posts more widely across all categories since it doesn’t rely on a linear selection process.
This is particularly helpful if you are looking for something specific or want to scroll through recent updates from friends and family quickly.
Swiping with arrows only offers limited options for navigation, so it’s highly recommended that users take advantage of this other swiping method to access a wider range of content available within the Instagram PC platform.
Like, comment, and share posts
Once you have learned how to swipe on Instagram via PC, you can now take advantage of being able to interact with posts. Although the interface may differ slightly from the app version, you still have the same options when deciding how to engage with content.
To like a post, click on the “heart” icon underneath each post. You can also comment on any post by clicking on the speech bubble in the lower right corner of each photo or video.
To share a post, select “Share” in the top right corner of a post or click and drag it onto your desktop or into another app or social platform if desired.
Remember that depending on your security settings, posts may not be visible to people not following you when they are shared outside of Instagram.
Explore Instagram Stories
Instagram stories can be a great way to interact with your followers easily. You can share behind-the-scenes photos and videos or show followers what’s happening in your life.
With the swipe feature, you can also easily explore all your friends’ stories and discover new content. This article will look at how to do this on Instagram for PC.
View stories from people you follow
Viewing stories on Instagram is a great way to engage with other users and discover content. To view stories from people you follow, go to the “Home” tab and scroll down until you see thumbnails of stories.
The thumbnails will feature circular profile pictures of the users with stories you can view and a colorful ring around each profile picture.
Tap on a profile picture to view that user’s story, or click on the “X” in the top right corner to skip it.
Now, swipe left or right to move between other available stories from people you follow. You can swipe up on their story for additional features such as polls, allowing them to collect viewers’ feedback and many more fun features!
Add your own stories
Creating your own Instagram story is relatively easy. Simply open the Instagram web app, click on your profile icon, and select ‘Your Story’ at the top of your profile page.
From there, you can add a photo or video taken from your computer’s camera roll or upload one from your device.
You can add text, stickers, and filters to create an eye-catching and engaging story for your followers. If you wish to use a photo snapped with your device’s camera, a plus sign (+) logo will appear in the top right corner of the story, giving you access to photos taken with that device in real time.
After adding photos or videos to your story, you can post them immediately or choose a later date. Once it is posted on Instagram for 24 hours or until you manually delete it.
Direct Message
Direct messaging (DM) on Instagram is a great way to interact with users and reach out to those you follow and those who follow you.
It’s also a great way to build user relationships and market your business. In this article, we’ll show you how to DM on Instagram PC in 8 easy steps so you can get the most out of your social media presence.
Send messages to people you follow
Sending messages with Instagram for Windows is a breeze. First, ensure the app is downloaded and installed on your PC or Mac. Once you’ve done so, here’s what you need to do:
- Log in to your account
- Go to your profile page and click or tap “Direct”
- Click on “New Message”
- Type the person’s name into the search bar at the top of the screen
- Click or tap on their profile picture in the list of results
- Enter a message into the text box at the bottom of their profile page
- Press “Send” when you are done
- The recipient will receive a notification and be able to reply to your message within minutes!
Reply to messages you receive
You will receive messages back once you have successfully sent a Direct Message on Instagram. You can find these messages by clicking the ‘Inbox’ tab at the top of your page. From here, you can see all your conversations or select the one you want to view and reply to by clicking the message.
To reply to a Direct Message, type out what you want to say in the box provided and click ‘Send’ when ready.
You should also remember that pictures and videos can be sent through Instagram Direct Messages, so if you have any images or videos that could help demonstrate what you are trying to say, this is another great option for communication.
Additionally, audio recordings can be sent and received through Instagram Direct Messages.
Explore Instagram Live
Instagram Live is a great way to engage with your followers. You can post stories, live streams, and other real-time content to your followers.
Integrating Instagram Live into your social media strategy can help you boost engagement, build relationships, and increase your brand visibility. Let’s look at how to use Instagram Live from your PC.

Watch live videos
Live videos have become an exciting and fun way to engage with your followers on Instagram. Live videos are short, interactive broadcasts you can create for up to one hour solo or with a friend.
While watching a live video, you can react in real-time by using emojis, asking questions in the chat section, and even commenting or voting on poll questions the creator of the Live video includes. You can also follow along with the action by swiping left to see who else is watching the broadcast or swiping right to get more information about it.
Here’s an easy 8-step guide on how you can watch Instagram live videos:
- Open your Instagram account and log into your profile.
- Look for stories at the top of your homepage, which appear in circles – these will have a pink ring around them that signifies they are live videos; tap your screen when the video appears.
- This will then take you straight into their broadcast and allow you to join their conversation and see what others are saying, too!
- If someone is already live streaming when you log onto Instagram, you’ll automatically get taken directly into their story; tap ‘unfollow’ at any time should you wish to stop viewing it – however, this won’t stop you from viewing other people’s broadcasts later on!
- To follow along faster with all of these conversations – swipe right on any feed item (such as photos, stories, etc.), and this will show an option allowing you to ‘Watch Live Stories Now,’ which is perfect if someone has started a broadcast. Still, anyone can join at any point during it!
- When inside any life story, if available – participants can comment (with typing) and ask questions within a poppable chat window that appears throughout – if enabled by the broadcaster (they could also disable this feature).
- You can also add reactions such as giving love or laughing when commenting along with others. However, please ensure the appropriate use of these emotions towards all aspects of content that appears throughout streams so we can all keep our conversations friendly & constructive!
- Suppose someone does have an open poll question enabled during their stream. In that case, that watcher can view & submit answers before time runs out – though viewers should stay aware and not move “inappropriate” requests being asked beforehand for maximum safety amongst everyone involved!
- Finally, when done, return home (by tapping “X” again) after finishing up broadcasting/tabbing away from active conversations/or clicking on other notifications so someone else may take over their current position & create something new within this space 🙂
Post your live videos
Live videos can be among the most exciting ways to share your experiences with followers on Instagram. Whether you’re attending a concert, having a backyard BBQ, or exploring interesting locations, create a live video and show them firsthand what you’re up to.
It’s easy to post your live video on the Instagram desktop app. Here are 8 simple steps:
- Log into your Instagram account if you haven’t already done so.
- Tap the Camera icon located at the top left corner of the page and select “Go Live” from the drop-down menu
- This will open up your camera and microphone so you can begin streaming audio and visuals right away
- As soon as you turn on your camera, you’ll see an icon for going live – Press this icon after adjusting any lighting or background preferences to begin broadcasting
- On PC, press the Start Live Video button to start going live from your computer
- A countdown timer will appear before streaming begins and will show viewers how much time they have left before it ends
- A comment section will appear just below where people can start leaving comments on what they are seeing as it’s happening in real-time
- Tap End after done discussing with viewers or when the time is up to stop streaming – an option will appear for saving or discarding this video recording
Post Photos and Videos
Posting photos and videos on Instagram from your PC may seem daunting, but it isn’t that hard. This guide will walk you through easy steps to swipe on Instagram from your laptop or desktop. You’ll learn how to quickly upload your photos and videos to Instagram in no time. Let’s get started!
Upload photos and videos
Uploading photos and videos to Instagram using your PC is an easy process. All you need is a supported web browser to access the Instagram website. Follow the steps below to post to Instagram for PC.
- Go to Instagram online and sign in with your account information.
- Click on the camera icon in the top left-hand corner of the page and select “Upload Photo/Video” from the drop-down menu.
- Select a photo or video from your device library or drag it into this window directly. You can also add multiple files simultaneously by pressing “Ctrl” (on Windows) or “Cmd” (on Mac).
- Add captions, tags, location information, and any other desired details for your post before hitting “Share” at the bottom right of this window.
Add captions, hashtags, and location tags
Once your photo or video is added to the post, you may want to include a caption to add context, hashtags to spread awareness, and location tags if posting from a place of business or popular destination.
A good rule of thumb for captions is to keep them between 75 and 150 characters; any more than that, readers might lose interest. For hashtags, be sure to research what’s trending in your industry and use relevant words as part of that hashtag. Additionally, try including no more than 5 hashtags in each post.
Finally, location tags can be helpful for those who are interested in information about where the poster is located. When adding a location tag, you can manually enter the name or search for it from the map after clicking on the “add location” option from the menu below your post.
Table of Contents